How to Color Leather Bag for a Stylish Update
Preparing Leather for Dyeing
Before you embark on the journey to color your leather bag, it’s crucial to prepare the leather properly. This includes cleaning and degreasing the leather and selecting the right type of dye.
Cleaning and Degreasing Leather
Cleaning leather before dyeing involves a range of products and techniques. First, remove any surface dirt and oils:
- Basic Cleaning: Start with a solution of water and mild soap. Use a soft cloth to gently clean the surface.
- Degreasing: To remove deeper oils, you can use cellulose thinners, which are effective in stripping oils from the leather (Leatherworker Forum).
- Using a Deglazer: Deglazers are made of alcohol, DNA, or acetone and are used to strip existing finishes. Apply sparingly, as excessive use can cause dye adhesion issues.
Here’s a table summarizing various cleaning agents and their usage order:
| Cleaning Agents | Order of Usage |
|---|---|
| Water and Soap | First |
| Alcohol | Second |
| Dish Soap | Third |
| Vinegar | Fourth |
| Ammonia | Fifth |
| Spot Remover | Sixth |
| Contact Cement Thinner | Seventh |
| Deglazer | Eighth |
| Acetone | Last |
Taking these steps ensures that the leather is free of any residues that might prevent the dye from adhering properly. For more detailed tips, check out the guide on how to clean a leather bag.
Selecting the Right Type of Dye
Choosing the correct dye is just as important as cleaning the leather. Different types of dyes offer various benefits and suit different leather types.
- Basic Dyes: These are suitable for achieving a range of colors and are relatively easy to apply.
- Acid Dyes: Great for vibrant colors, acid dyes penetrate the leather well.
- Sulfur Dyes: Known for their durability, sulfur dyes are ideal for items that will undergo heavy use.
- Natural Sunlight: Believe it or not, sunlight can also serve as a natural dye, imparting a unique shade to the leather.
When dyeing leather, natural vegetable-tanned leather is one of the best options due to its porous nature, which allows for even dye absorption.
By carefully cleaning and selecting the appropriate dye, you’ll be setting a strong foundation for an effective and stylish update to your leather bag. Check out our detailed guide on how to dye leather bag for more information on dyeing techniques.
Techniques for Coloring Leather
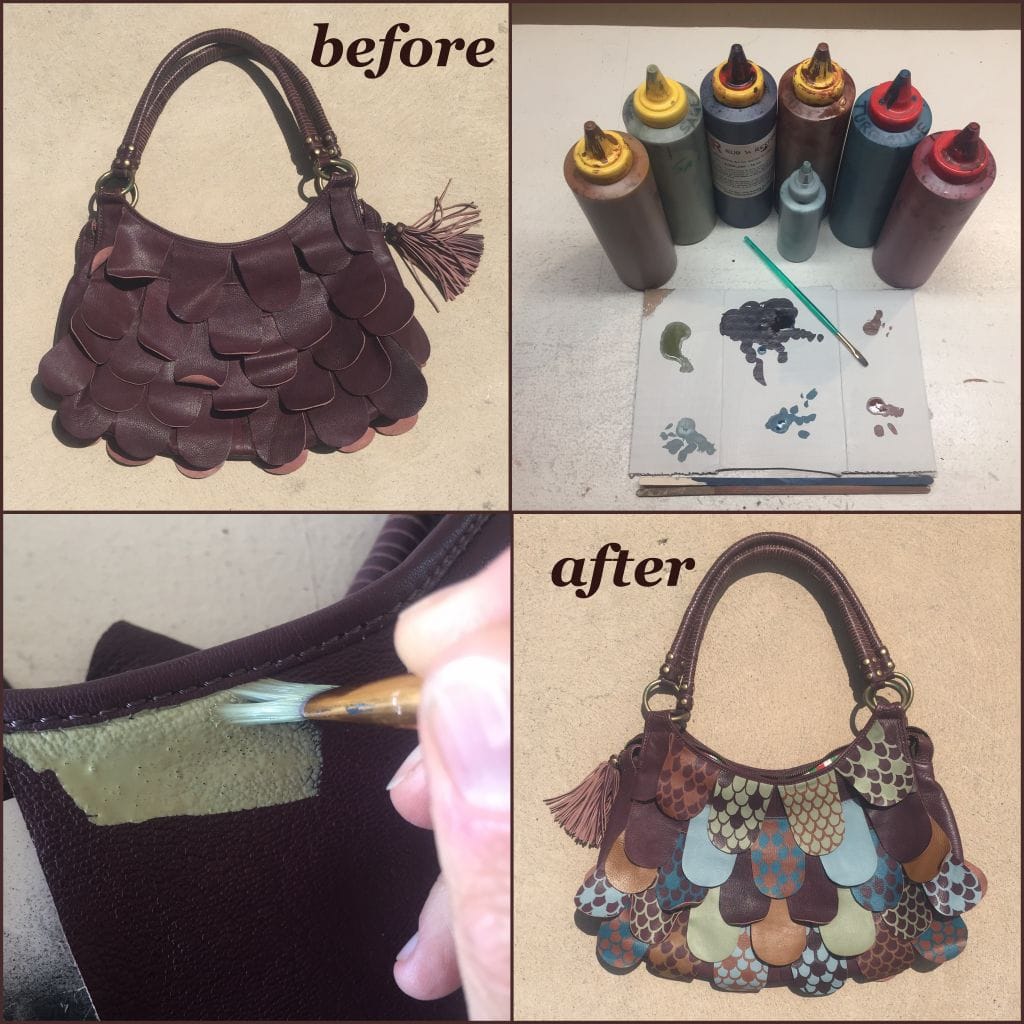
Coloring leather can transform your bag, giving it a fresh, stylish look. Below are some practical techniques for applying dye to your leather bag.
Applying the Dye in Coats
When dyeing leather, applying the dye in thin, even coats is the key to success. This method ensures that the color is evenly distributed and that the leather absorbs the dye properly.
Steps for Applying Dye in Coats
- Preparation: Ensure the leather is clean and free from oils or residues. Refer to our guide on how to clean a leather bag.
- Diluting the Dye: Mix the dye according to the product instructions. This often involves diluting it with an appropriate solvent to achieve the desired shade (Classy Leather Bags).
- Application: Use a sponge or brush to apply the dye in thin coats. Allow each coat to dry completely before applying the next one to prevent uneven dye absorption.
| Steps | Action | Tips |
|---|---|---|
| 1 | Preparation | Ensure bag is clean |
| 2 | Diluting the Dye | Follow product instructions |
| 3 | Application | Apply thin coats, dry between |
For detailed instructions, you can visit our article on how to dye leather bag.
Utilizing Different Dyeing Methods
There are various methods to apply dye to leather, each catering to different needs and results.
Hand Dyeing
Hand dyeing offers precise control over color and shading, making it ideal for small, detailed projects. This method involves applying dye using a brush or sponge, layering it to build the desired color.
Pros:
- High control over application
- Ideal for artisans
Cons:
- Time-consuming
- Skill-dependent
Drum Dyeing
Drum dyeing is effective for large quantities of leather. Leather pieces are placed in a rotating drum with dye, ensuring thorough and uniform color penetration. This method is commonly used for upholstery or car interiors where consistency is crucial.
Pros:
- Uniform color
- Efficient for bulk dyeing
Cons:
- Requires specialist equipment
- Not suitable for individual DIY projects
Spray Dyeing
Spray dyeing is a quick method which involves using a spray gun to apply dye evenly across the leather surface. It is especially useful for large areas such as furniture or garments (Deskera).
Pros:
- Fast application
- Suitable for large surfaces
Cons:
- May require additional protective measures
- Risk of uneven application
Dip Dyeing
Dip dyeing involves submerging the leather into a dye solution, perfect for smaller leather items. This method can create a gradient effect, giving a unique, artistic touch to items like wallets or keychains (Deskera).
Pros:
- Creates unique gradient effects
- Good for small items
Cons:
- Less control over final color
- Potential for uneven results
By understanding these methods, you can choose the best technique for your project. For more detailed steps on preparing and finishing your leather bag, explore the how to restore leather bag guide.
Sealing and Finishing
After successfully dyeing your leather bag, sealing and finishing the dyed leather is crucial to preserve the color and ensure longevity. This section will guide you through the use of finishing products and buffing techniques to achieve a professional and polished look for your leather bag.
Using Finishing Products
Using finishing products is essential to seal the dye and protect your leather bag from color transfer, UV damage, and other environmental factors.
| Finishing Product | Benefits | Application Method |
|---|---|---|
| Fiebing’s Tan Kote | Prevents color transfer, smooth finish | Apply in circular motion, let dry |
| Acrylic Resolene | UV protection, waterproof, shiny finish | Mix 50/50 with water, apply thin layers |
-
Fiebing’s Tan Kote: After applying the final coat of dye and allowing it to dry, work Fiebing’s Tan Kote into the leather in a circular motion. This product prevents color transfer to your clothes. Let the finish dry completely and then buff it using a cotton cloth for a polished look (Gold Bark Leather).
-
Acrylic Resolene: Acrylic Resolene is highly recommended for sealing dyed leather due to its UV protection, almost waterproof qualities, and beautiful shine (Leatherworker.net). Mix Resolene 50/50 with water for best results. Apply in thin layers, allowing it to dry for 24 hours between coats. This ensures a smooth, professional finish.
For further guidance on maintaining and protecting your leather bag, check out our articles on how to store leather bags and how to restore leather bag.
Buffing and Polishing Techniques
Buffing and polishing your leather bag after applying the finishing products will enhance its appearance and give it a polished look. Follow these steps for the best results:
-
Buffing: After the finish has dried, use a clean, soft cloth to buff the leather in a gentle, circular motion. This process will remove any excess finish and bring out a natural shine. Ensure the cloth and surface are clean to avoid any contaminants that can affect the look of your leather (SLBAG).
-
Polishing: For an extra glossy finish, consider using a leather polish. Apply a small amount to your cloth and gently rub it into the leather. Allow it to sit for a few minutes, then buff it again for a high-gloss sheen.
| Technique | Description | Benefits |
|---|---|---|
| Buffing | Using a soft cloth in a circular motion | Removes excess finish, adds shine |
| Polishing | Applying leather polish and buffing | High-gloss finish, enhances appearance |
Taking the time to properly seal, buff, and polish your leather bag ensures that it remains stylish and durable. For more tips on caring for your leather bags, explore our articles on how do you clean a leather bag and how to clean patent leather bag.
Troubleshooting Dyeing Issues
Even with meticulous preparation, you may encounter some issues while dyeing your leather bag. Here are some solutions to common problems that might arise:
Addressing Uneven Dye Absorption
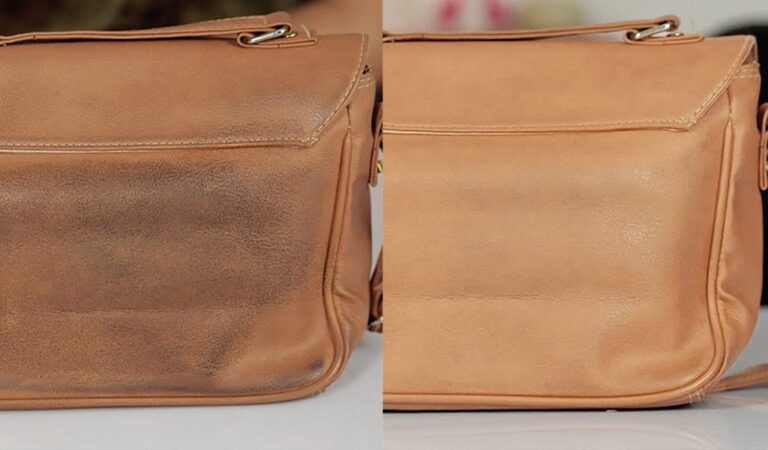
Uneven dye absorption is a frequent issue when dyeing leather. This can result in patchy and inconsistent color on your bag. Here are a few methods to address this problem:
-
Washing Technique: Utilizing a washing technique can help the leather surface absorb dye more evenly. This involves thoroughly cleaning the leather before dyeing, ensuring that any residues or oils that could interfere with dye absorption are removed. For more details on cleaning, refer to our guide on how to clean a leather bag.
-
Dye Prep Solutions: Consider using dye prep solutions containing ammonia to enhance dye absorption when other methods have been unsuccessful. These solutions can help open the leather’s pores, allowing the dye to penetrate more evenly. (Leatherworker Forum)
Dealing with Discoloration on Metal Accents
Metal accents such as buckles, zippers, and studs can discolor during the dyeing process. Protecting these components is crucial to maintaining the overall aesthetic of your leather bag:
- Covering Metal Pieces: Before applying dye, cover the metal pieces with foil to shield them from the dye and reduce the risk of discoloration. This is especially effective when applying heat to set the dye. (Anuent)
| Metal Part | Suggested Protection |
|---|---|
| Buckles | Cover with Foil |
| Zippers | Cover with Foil |
| Studs | Cover with Foil |
For additional information on maintaining your leather bag, including cleaning and restoring techniques, you can explore our articles on how to clean a coach leather bag and how to restore leather bag.
These troubleshooting tips should help you achieve a more consistent and professional result when dyeing your leather bag, ensuring that it looks stylish and well-maintained.

